
Tevo Tarantula Laser: A Comprehensive Upgrade Guide
The Tevo Tarantula 3D printer is a popular choice for hobbyists due to its affordability and ease of use. However, the addition of a laser module transforms it into a versatile tool capable of laser engraving and cutting. This guide provides a step-by-step approach to upgrading your Tevo Tarantula with a laser module, ensuring a safe, efficient, and enjoyable experience. Whether you’re a seasoned maker or a newcomer to the world of laser engraving, this guide will equip you with the knowledge and skills necessary to successfully integrate a laser module and unlock new creative possibilities. From understanding the basics to troubleshooting common issues, this comprehensive guide covers everything you need to know to enhance your Tevo Tarantula’s capabilities.
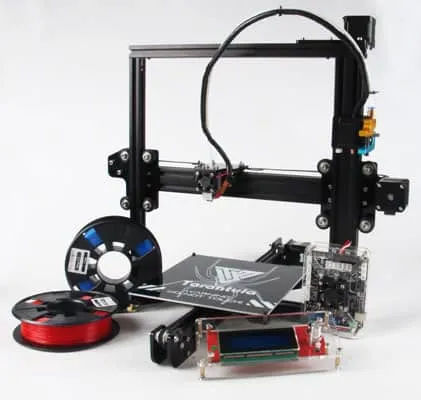
Understanding Your Tevo Tarantula Laser
Before diving into the upgrade, it’s crucial to understand the core components and how they interact. The Tevo Tarantula is a Cartesian-style 3D printer, meaning its print head moves along the X, Y, and Z axes. The laser module will typically replace the extruder, utilizing the existing motion system for precise laser positioning. Familiarize yourself with the printer’s control board, power supply, and firmware. This understanding is vital for a smooth upgrade process, allowing you to properly connect the laser module, configure the firmware, and calibrate the system for optimal performance. Recognizing the printer’s framework will help you during installation and when troubleshooting any issues that may arise.
Laser Safety Precautions

Laser safety is paramount. Always wear appropriate laser safety glasses that are rated for the specific wavelength of your laser module. Never look directly at the laser beam or its reflections. Ensure that the laser operates within an enclosed space or in a well-ventilated area to prevent harmful fumes. Use a fire-resistant surface for your work, and always have a fire extinguisher nearby. Never leave the laser unattended while operating. These safety precautions are not just recommendations; they are essential to protect your eyes, health, and surroundings. Taking these steps will help ensure you can enjoy laser engraving safely.
Essential Tools and Materials
Gather the necessary tools and materials before you begin. You will need a laser module kit, which typically includes the laser diode, mounting hardware, and wiring. You’ll also need a set of Allen wrenches, a screwdriver, and possibly a multimeter for testing connections. Other useful items include electrical tape, zip ties for cable management, and heat shrink tubing for protecting wires. Always use quality materials for long-term use. Furthermore, having the right tools and materials prepared beforehand streamlines the upgrade process. This preparation ensures you can proceed without interruption and simplifies the overall procedure. Make sure all the tools are accessible.
Step 1: Preparing Your Tevo Tarantula
Removing the Existing Parts

Start by disconnecting the power and removing the extruder from your Tevo Tarantula. Carefully detach the extruder motor wires and any other connected cables. Remove the extruder from its mount, usually secured by screws or bolts. Keep the original parts in a safe place in case you want to revert to 3D printing. During this step, take photos of the connections before disconnecting them to assist with reassembly or if you have any issues. This step is the foundation to allow the laser module to be successfully installed.
Cleaning the Frame
Clean the frame and any remaining debris from the extruder removal. A clean frame provides a stable platform for mounting the laser module. Use a soft cloth and isopropyl alcohol to remove any grease or plastic residue. Also check to see if all the wires are correctly routed and that the movement of the X and Y axes is smooth. Ensuring a clean workspace will also protect your equipment and prevent potential malfunctions during the process. This also helps with the aesthetics of the finished product.
Step 2: Installing the Laser Module
Mounting the Laser Module

Attach the laser module to the existing mount or the provided mounting hardware, following the manufacturer’s instructions. Ensure the module is securely fastened and aligned correctly, taking into account the focal distance recommended for your laser. Adjust the height of the laser module to achieve the proper focal length for your chosen material. Using the correct focal length is important for getting the best results. Proper mounting ensures accurate laser placement and optimal engraving or cutting performance. Take your time, and don’t rush this step; accuracy is key.
Wiring the Laser Module
Connect the laser module wires to the appropriate terminals on the control board. Refer to the laser module and control board documentation for the correct wiring diagram. Usually, the laser module is connected to the fan output or a dedicated laser port. Carefully route the wires to prevent interference with the printer’s movement. Use zip ties or cable clips to secure the wires. Double-check all connections to ensure they are secure and properly insulated. Proper wiring prevents short circuits and ensures the laser module receives power and control signals. Correctly done wiring will keep the module from potentially failing.
Step 3: Firmware Configuration
Flashing New Firmware

Update the printer’s firmware to support laser functionality. This typically involves using software like Arduino IDE or similar to upload a modified version of the firmware. Download the correct firmware for your control board from the manufacturer’s website or a reliable source. Upload the firmware to the control board via USB, and ensure a successful flash. This step will enable you to control the laser module using G-code commands. Back up your original firmware before flashing a new one. If something goes wrong, you can revert back to the original.
Configuring Laser Parameters
After flashing the firmware, configure the laser parameters within the firmware settings. Set the laser power levels, PWM (Pulse Width Modulation) frequency, and other relevant settings to match your laser module’s specifications. Adjust the settings to get the desired engraving and cutting results, experiment with different settings to find the best configuration for various materials. Configuring the parameters correctly is key for the laser to function as intended. Also make sure to save the new configurations after editing.
Step 4: Software Setup and Calibration
Choosing the Right Software
Select the appropriate software for controlling the laser. Popular choices include LaserGRBL and LightBurn. Install the software on your computer and configure it to communicate with the Tevo Tarantula and laser module. These softwares allow you to load images and G-code, control the laser power and speed, and preview your designs before engraving or cutting. Choose a software based on your preference, features, and user-friendliness. The software you select will be your primary control for engraving and cutting.
Calibrating the Laser for Optimal Performance
Calibrate the laser module for optimal performance. This involves adjusting the laser power, speed, and focus settings to achieve the best results on different materials. Perform test engravings and cuts to determine the ideal settings for various materials, like wood, acrylic, or paper. You may need to experiment with different settings until you achieve the desired result. Calibration is an ongoing process, as different materials and thicknesses will require different settings. Keep a log of your successful settings for future projects. It is a good practice to do this every time a new material is used.
Step 5: Test Cuts and Adjustments
Performing Test Cuts

Once the setup and calibration are complete, perform test cuts or engravings on scrap materials to ensure the laser module is functioning correctly. Start with low power and speed settings and gradually increase them until you achieve the desired results. Also experiment with various speeds and power levels until you have it right. Pay close attention to the quality of the cuts or engravings. Test cuts will give you a good overview of whether you’re doing it right or not. These test runs will prevent errors and allow for adjustments before beginning a major project.
Troubleshooting Common Issues
Troubleshooting can be a learning process. If you encounter issues such as the laser not firing, weak engraving, or poor cutting, check the wiring connections, laser power settings, and focal distance. Ensure the firmware is correctly configured, and the software settings are compatible with your laser module. Consult online forums, user manuals, or the manufacturer’s website for troubleshooting guides and support. Patience and persistence are essential when troubleshooting any issue. Also, a basic understanding of electronics will help in the troubleshooting.
Maintaining Your Tevo Tarantula Laser
Cleaning and Maintenance Tips
Regularly clean the laser lens with a soft cloth and lens cleaner to remove any debris or residue. Keep the printer’s frame and components clean and free of dust. Periodically check the wiring and connections for any signs of wear or damage. Lubricate the printer’s moving parts as needed. Proper maintenance ensures the laser module and the printer continue to function efficiently and extends the lifespan of your equipment. Proper cleaning will prevent damage and maintain quality over time.
Troubleshooting
If you encounter issues, refer to troubleshooting guides and forums. Common problems include weak laser output, incorrect focus, and software communication errors. Always verify all connections. Double-check your settings and the laser module specifications. Check that the wiring is correct. It’s also useful to consult the user manual and search online forums for solutions to common problems. Detailed troubleshooting information will ensure that you are able to continue your projects with less trouble. If you still cannot solve your problems, contact the manufacturer’s customer support.